
Jobs in Lisbon 2026 – Find Work Opportunities in Portugal
Explore the latest jobs in Lisbon and find opportunities that match your skills and goals. Apply today and start building your future in one of Europe''s most dynamic capitals.
Installation and Maintenance Tips for Rack-Mounted Lithium Batteries
Proper installation and maintenance of rack-mounted lithium batteries ensure optimal performance and safety. Here''s a guide to some common questions about the process.
What Are the Steps for Rack Battery Installation?
Rack battery installation involves a series of carefully planned steps to ensure safety, reliability, and optimal performance. From selecting the right location to securing the battery modules and
Step-by-Step Installation Guide for Rack Mounted Lithium
Following this step-by-step guide ensures a safe and effective installation of rack-mounted lithium batteries. Proper installation not only enhances battery performance but also

Cafe Flora: Your Premier Destination for Vegan & Vegetarian Dining in
Experience delicious vegan and gluten-free cuisine at Cafe Flora. Located in Seattle, we offer a casual dining atmosphere, outdoor seating, and a full bar. Enjoy takeout, delivery, and catering services, all
How to Install Rack Lithium Batteries Safely and Efficiently?
Installing rack lithium batteries safely requires assessing site conditions (load capacity, ventilation), securing modules with anti-vibration mounts, and following NEC/UL electrical codes. Always use UL
Rack Battery Pack User Manual
It is very important and necessary to read the user manual carefully before installing or using the battery. Failure to follow any of the instructions or warnings in this document can result in electrical shock,
Top 10 Common Mistakes When Installing Rack Lithium Battery Systems
Installing rack lithium battery systems incorrectly can lead to poor performance, safety hazards, and reduced lifespan. Common errors include ignoring ventilation, improper wiring, and bypassing the
How To Install Server Rack Battery Backup?
Server rack battery backup (UPS) installation requires mechanical mounting, cable routing, and system testing. Begin by disconnecting mains power, securing UPS/battery units to rack rails via mounting

How to Properly Size and Install Lithium-Ion Rack Battery Systems for
Lithium-ion rack battery systems are crucial for energy storage in various applications, including data centers, telecommunications, and emergency response. Proper sizing and installation are essential
Adding Vatrer Rack Battery to Solar Assistant
I used the JBD/Overkill UART to USB adapter on the Vatrer Rack Battery by replacing the Bluetooth with the USB adapter. I then changed settings via JBDTools_ChangePow software
How To Install Rack Mount LiFePO4 Batteries?
Installing rack mount LiFePO4 batteries involves securely mounting the heavy battery modules into the designated rack slots, wiring them in series or parallel, connecting busbars, inverter, and essential
Installation And Commissioning
We recommend that batteries are properly installed in HBL battery racks or modules or HBL battery cabinets. The use of other operator-specific solutions may render the warranty for the batteries null
Top 7 Signs Your Pallet Racking May Fail
Crooked racks either weren''t installed properly, or an impact set them off-kilter. If the racks were installed many years ago, the foundation may have settled and that''s what''s skewing the rack.
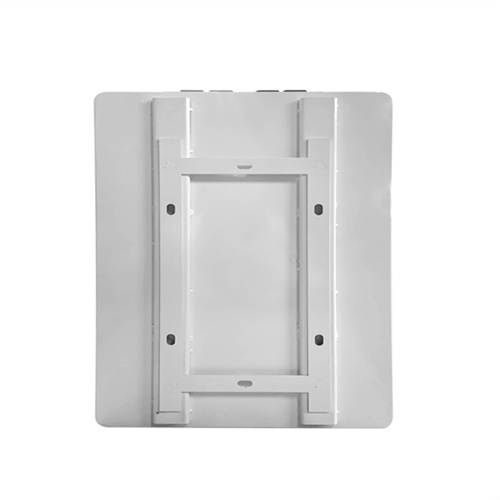
Battery Rack Installation Guide
Mount the racks sequentially to the required number of layers (up to five). Install the top connection strip on the uppermost layer, then tighten the M6 screws on the connecting strip using a spanner
Cafe Flora, Floret, Flora Bakehouse | Seattle Vegetarian Restaurants
A cozy cafe and bakery bringing seasonally inspired pastries, breads, sandwiches and a full menu of inventive Stumptown espresso drinks to the Beacon Hill neighborhood.
Comprehensive Guide to Choosing and Installing a Battery
This comprehensive guide covers everything you need to know about choosing and installing rack mount lithium batteries, focusing on their benefits, performance, and safety features.
Standard Battery Rack Installation Instructions
Attach insulated rails to support(s) (1). Space according to required width. Tighten all bolts. Bolt supports and uprights (16) together using bolt (18), washer (15) and nut (9). Fix braces (17) in position A and B
Cafe Flora Menu and Prices: Full Menu with January 2026 Updated
Quick Menu Navigation starters, soups, & salads entrees breakfast scrambles sandwiches & pizzas sides & specialty items dessert beverages View Cafe Flora''s menu prices, nutrition, locations and
3 FAQs about [Installing rack on crooked battery]
How do I install a battery rack?
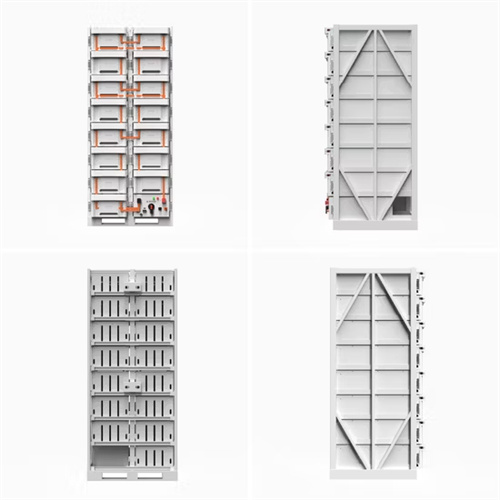
Battery Rack Installation Guide Step 1 Place the rack as shown, ensuring that the positions are limited by the guide rail slots (the sides with the grounding connection nuts should face outward). Step 3 Mount the connecting strip and secure it to the top of the rack using M6 screws through the round hole. Step 2
How do I install a rack?
Mount the racks sequentially to the required number of layers (up to five). Install the top connection strip on the uppermost layer, then tighten the M6 screws on the connecting strip using a spanner (recommended torque: 6 N·m).
How do I install a second layer rack?
Position the second layer rack, align it using the guide rail slots, and secure the connecting strip (waist hole) to the bottom of the second layer rack. Note: The two adjacent layers of rack should be vertical aligned. Step 5 Mount the racks sequentially to the required number of layers (up to five).